2046
Day 1 of a three day collagraph course at Leicester Print Workshop
A4

Today was day 1 of a three day bank holiday weekend collagraph course at Leicester Print Workshop, led by printmaker Charles Shearer. I signed up to this course as I want to recover my enthusiasm for collagraph printmaking, which latelyI have lost.
Today Charles introduced us to a way of making a collagraph plate that’s completely different to my former approach, which was basically intaglio, like etching. In this version of making the plate we used Environmount board. This has a smooth top surface and several under layers.  We used various mark making tools and knives to mark to card plate, peeling off layers, drawing, pressing into and generally experimenting. At first I found it hard to reverse my thinking, to realise that anything that was peeled away would be lighter or white, revealing the paper we print onto. This is because the plate is inked by surface rolling like a linocut. Before printing the plate is sealed with shellac.
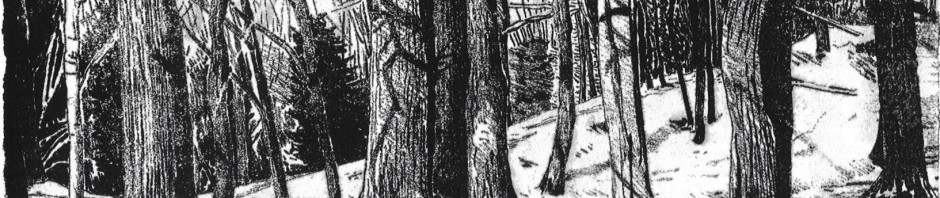
Above is my plate before I printed it and to the left is the plate with ink rolled onto it.
The first time the plate was inked up using a large rubber roller and printed onto dry Five Seasons paper from John Purcell Paper.
 It was hard for me to understand or predict what the print would look like until I saw it printed for the first time. After printing I could see how different marks and peelings printed. I could make a greater range of marks and tones using this board than the mount board that I usually use. Environmount is thinner and therefore easier to cut into shapes and cut into to reveal the lower layers but seemed more robust. We could also recut and reseal after printing if we wanted to make changes.
This was the morning’s work!
In the afternoon Charles demonstrated how to use colours to  ink the lower layers of the plate in a more intaglio way, drawing ink cross the surface with a plastic card and rubbing in and polishing away in areas and then using the roller to ink up the top surface. Inking up the plate in this way allowed for a range of colours and white of the paper in the lower layers and a contrasting colour on the top surface to work together in an interesting way. This time we printed onto Fabriano Rosaspina paper which had been soaked and then blotted until damp.
To the left is the inked up plate and blow is the final print.


Thanks for sharing the process, looks like it was both productive and rewarding. 😁
LikeLiked by 1 person